How to Limewash Your Brick Home

Melissa Roberts Interiors, home decor blog, diy blog, diy project, diy limewash, diy limewash project, limewash, how to limewash, how to limewash your brick home, easy steps to limewash your home. how to limewash walls. how to limewash your fireplace, patio remodel, brick walls, brick patio, brick floor, limewash

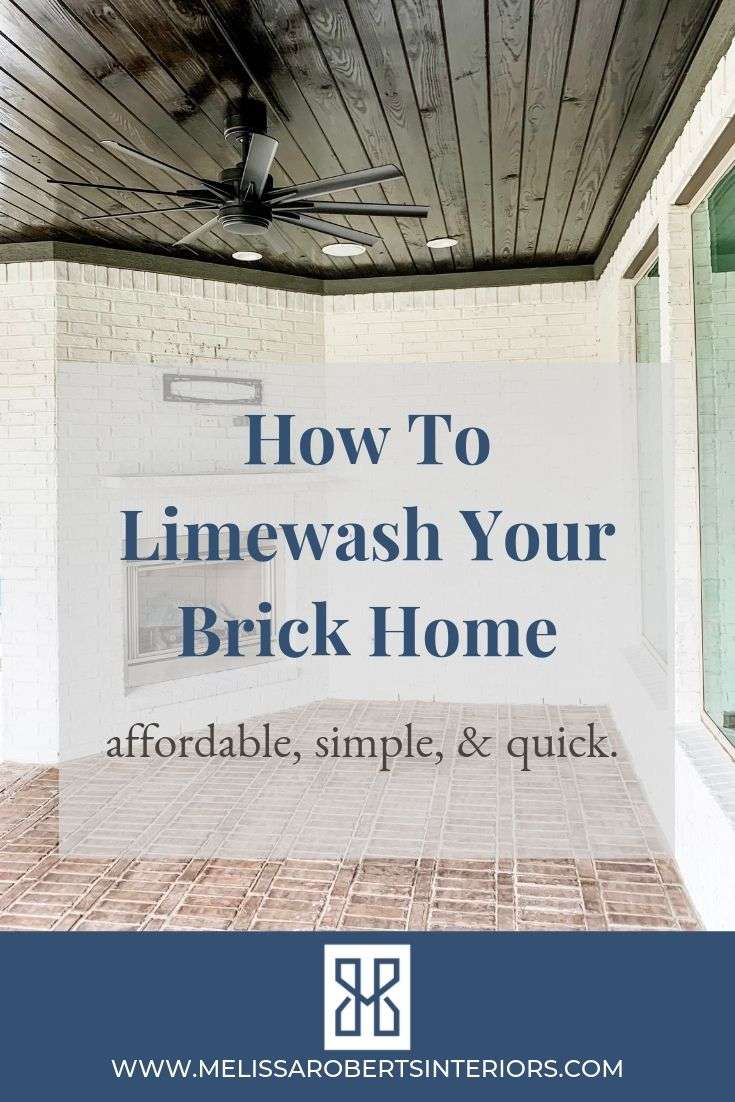
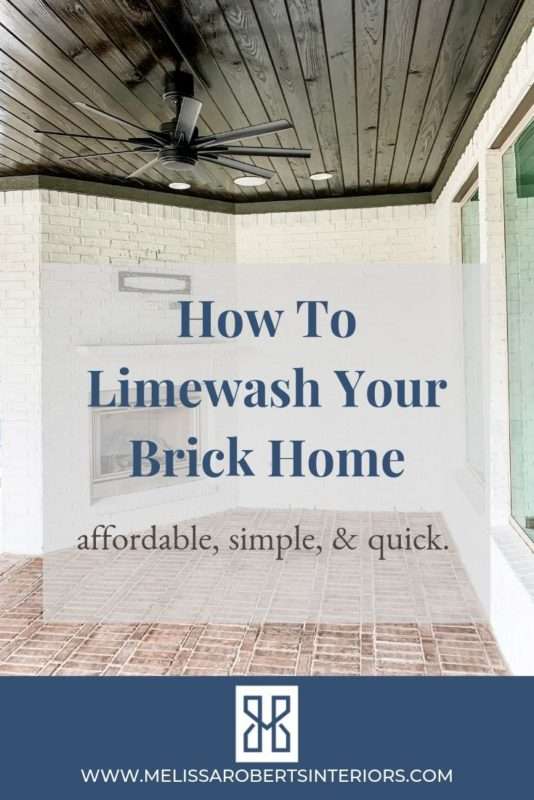
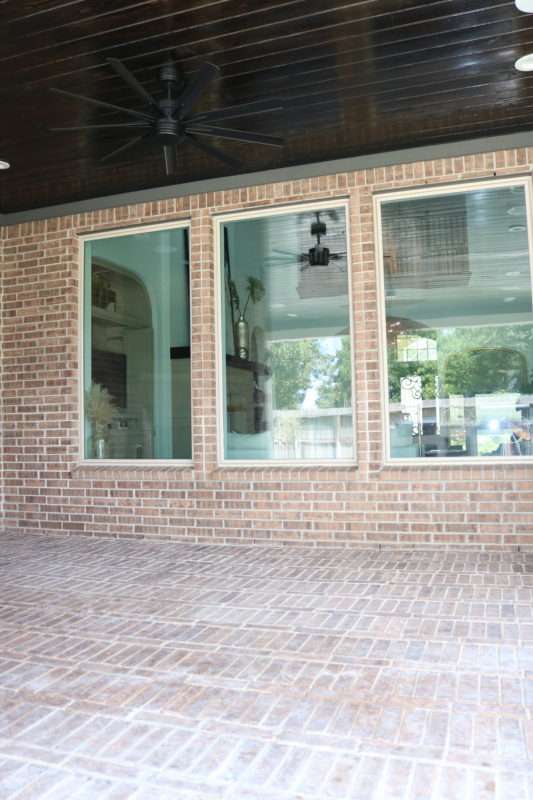
Are you tired of looking at your brick home? Maybe you love brick but not the color. I have a simple solution that is DIY friendly. I am sharing all the details and everything I learned along the way so you can learn how to limewash your brick home. If I can do this, so can you. You may have noticed by now that I am not a “DIY-er” but this was easy enough for even me!
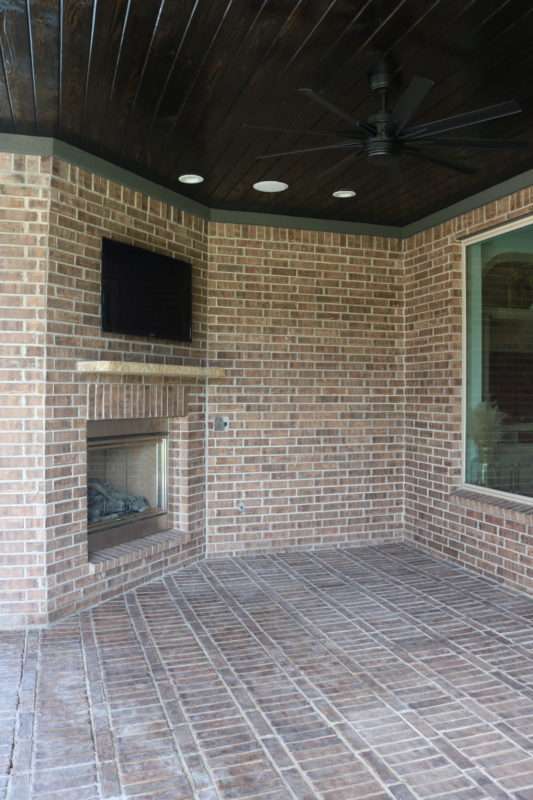
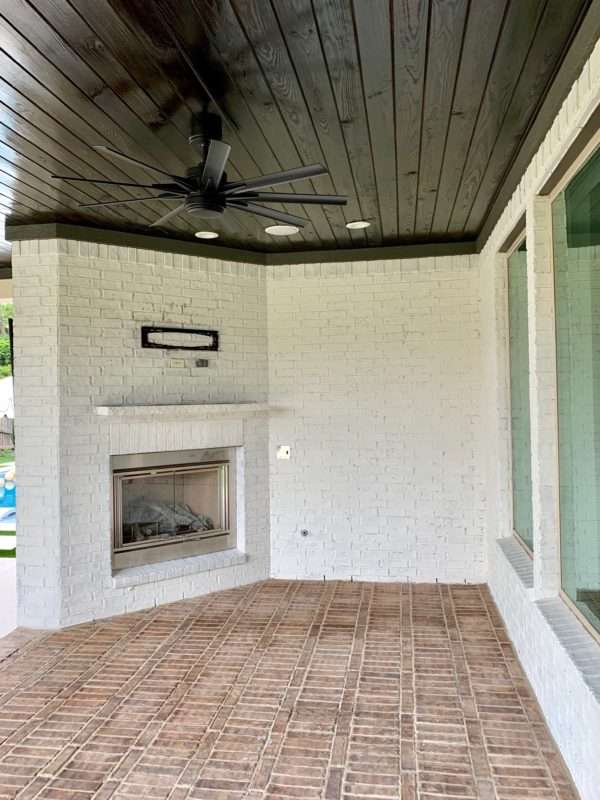
Melissa Roberts Interiors, home decor blog, diy blog, diy project, diy limewash, diy limewash project, limewash, how to limewash, how to limewash your brick home, easy steps to limewash your home. how to limewash walls. how to limewash your fireplace, patio remodel, brick walls, brick patio, brick floor, limewash

The past few months, I have been focusing on our outdoor oasis. It truly is a dream come true! The extended patio and new pool are now complete. Furniture is arriving, and I’m over-analyzing every detail along the way. That’s how I get here…limewashing our existing patio. After adding so many bright and beautiful features to our backyard, I couldn’t stop starring at the redundant & dark, brown brick. With the brick covering the patio floor and the walls, it made the patio feel more like a cave than a relaxing lounge area. I had to make a change to break up the brown on brown.

BEFORE


How to Limewash Your Brick Home

I spoke to a professional painter (whom I trust) and asked his opinion on painting brick. He said it was doable, but the process must be done diligently, and the maintenance is high. ENOUGH SAID. Limewashing is a better alternative since the maintenance is much lower and the process is simple. A few easy steps, very few products, and a little time are all it took to get this patio popping!
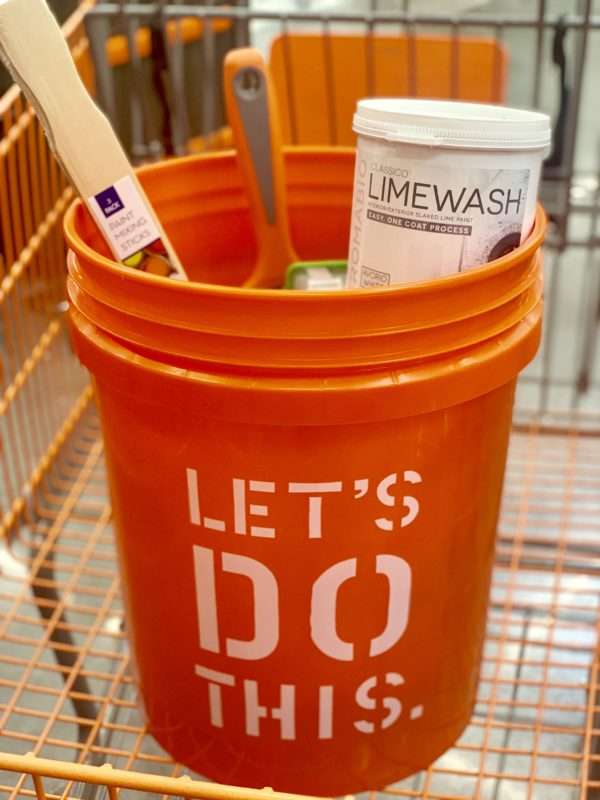
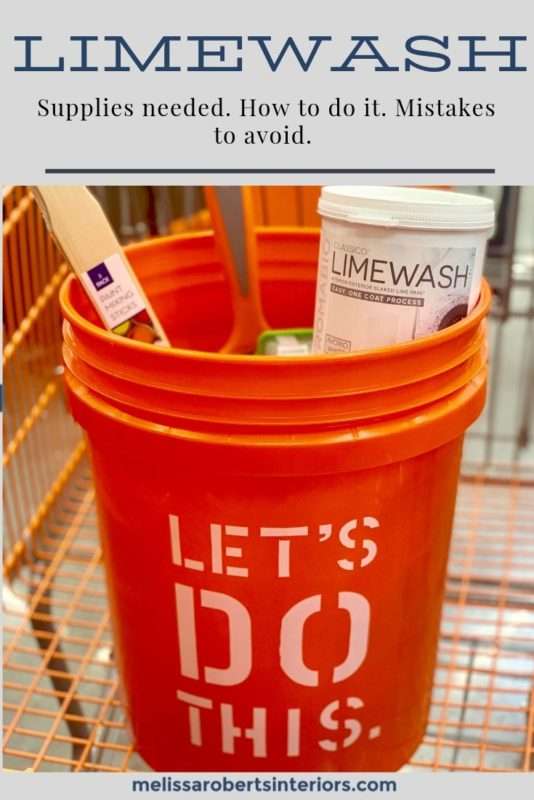
Melissa Roberts Interiors, home decor blog, diy blog, diy project, diy limewash, diy limewash project, limewash, how to limewash, how to limewash your brick home, easy steps to limewash your home. how to limewash walls. how to limewash your fireplace, patio remodel, brick walls, brick patio, brick floor, limewash

Products

Click each image below to purchase the exact products I used during this DIY project. Somehow, I lucked out and went to Home Depot the day they clearance-priced the Limewash product. You can see what I paid on my IG hi-lights under “limewash”.

I used 3-quart size containers to cover our patio. The patio is approximately 13′ wide by 12′ deep. I chose the brand of limewash called Romabio, don’t forget to research before you purchase. Romabio is known for its high quality and long-lasting durability. There are several color options to choose from. I used Avario White since it works with both cool and warm tones, but also it isn’t a stark white color.

Melissa Roberts Interiors, home decor blog, diy blog, diy project, diy limewash, diy limewash project, limewash, how to limewash, how to limewash your brick home, easy steps to limewash your home. how to limewash walls. how to limewash your fireplace, patio remodel, brick walls, brick patio, brick floor, limewash

Step One:

After removing everything from the area (furniture, potted plants, etc.) lay down a drop cloth over the area, you will be focusing. The mistake I made here, not making sure the brick floor was covered entirely, this led to a bit of cleaning that could have been avoided if I had taken my time before I started. If you are limewashing over a grassy area, you probably don’t have to worry about this. You can also use frog tape to tape off any other walls, millwork, or other materials you don’t want to get limewash on.

Melissa Roberts Interiors, home decor blog, diy blog, diy project, diy limewash, diy limewash project, limewash, how to limewash, how to limewash your brick home, easy steps to limewash your home. how to limewash walls. how to limewash your fireplace, patio remodel, brick walls, brick patio, brick floor, limewash

Step Two:

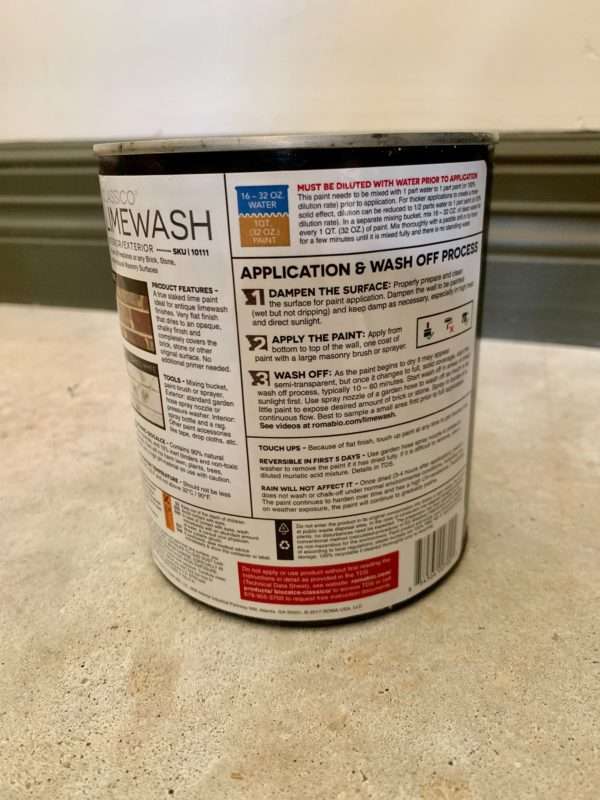
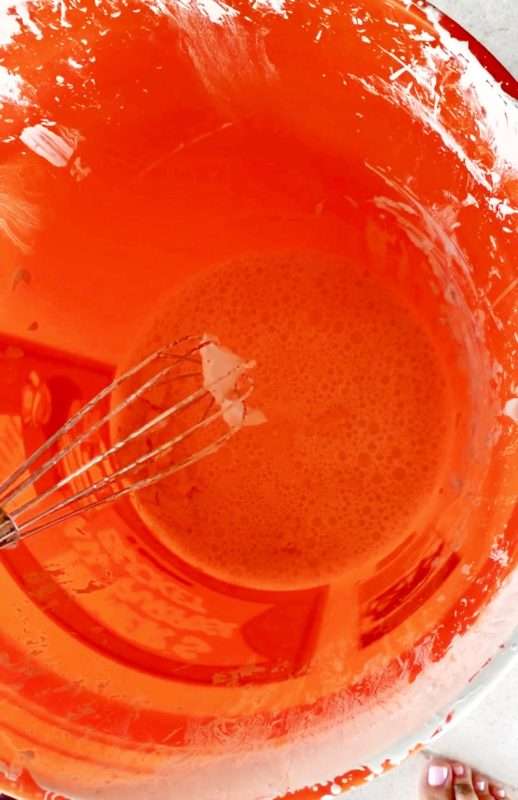
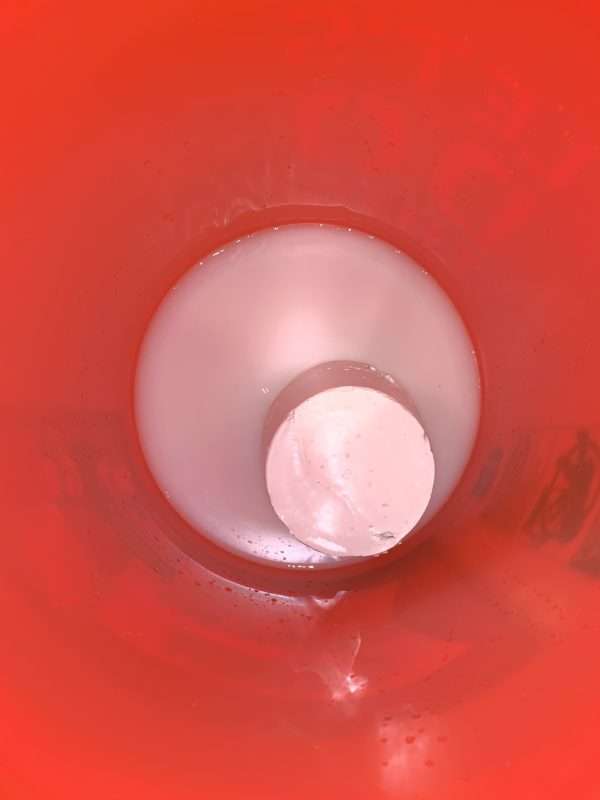
Mix the limewash with water in a 4-gallon bucket: the more water, the less coverage. On the back of the limewash container, you will see precisely how to mix the product based on your goals. I used a 1:1 ratio, and it turned out perfectly. You can choose to purchase a drill mixer or be cheap like me and use a large whisk; this was so easy. I started out trying to mix it with a paint stirrer, but this wasn’t working; don’t waste your time!

Step 3

You are now ready to start “painting”. Before applying the material to the brick, spray down the surface with water. I used a water hose with a spray attachment and sprayed the wall from top to bottom. Once the dripping stopped, I began painting. Instead of using a roller, which I feel wouldn’t apply well and would absorb most of your product, use a masonry brush. This brush will get the job done much quicker. One thing I learned during this step is that a masonry brush is too large for the small areas or for where you need to trim out around doors and such. I used an angled paintbrush for all trimming and for the areas where I wanted to add coverage to the mortar in between bricks. Simply brush the product on starting at the bottom of the wall making your way to the top. I found it worked best if I used horizontal strokes instead of vertical.

Melissa Roberts Interiors, home decor blog, diy blog, diy project, diy limewash, diy limewash project, limewash, how to limewash, how to limewash your brick home, easy steps to limewash your home. how to limewash walls. how to limewash your fireplace, patio remodel, brick walls, brick patio, brick floor, limewash

Melissa Roberts Interiors, home decor blog, diy blog, diy project, diy limewash, diy limewash project, limewash, how to limewash, how to limewash your brick home, easy steps to limewash your home. how to limewash walls. how to limewash your fireplace, patio remodel, brick walls, brick patio, brick floor, limewash{even the hubs helped for a bit}

Melissa Roberts Interiors, home decor blog, diy blog, diy project, diy limewash, diy limewash project, limewash, how to limewash, how to limewash your brick home, easy steps to limewash your home. how to limewash walls. how to limewash your fireplace, patio remodel, brick walls, brick patio, brick floor, limewash

Step 4

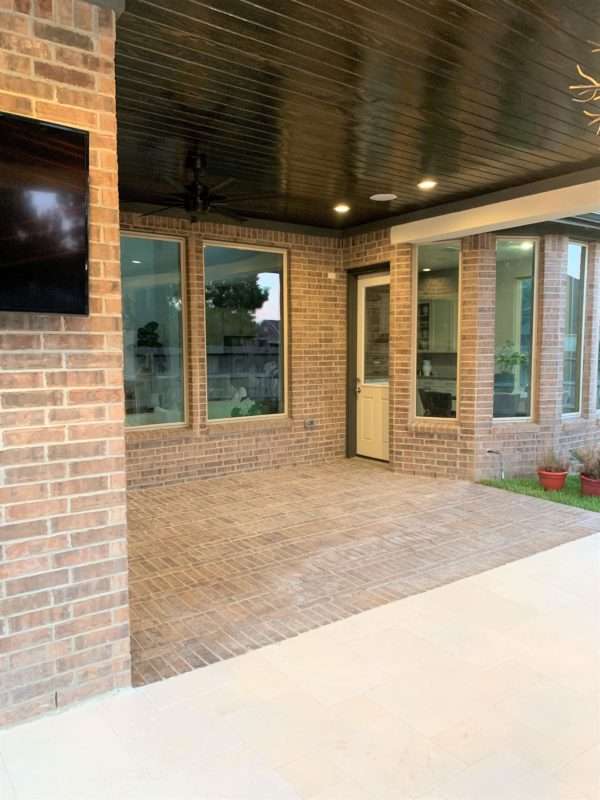
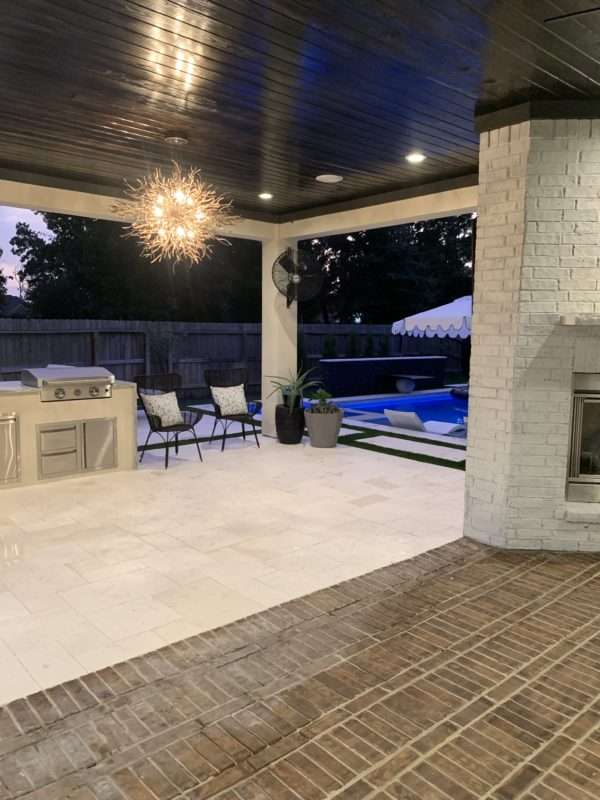
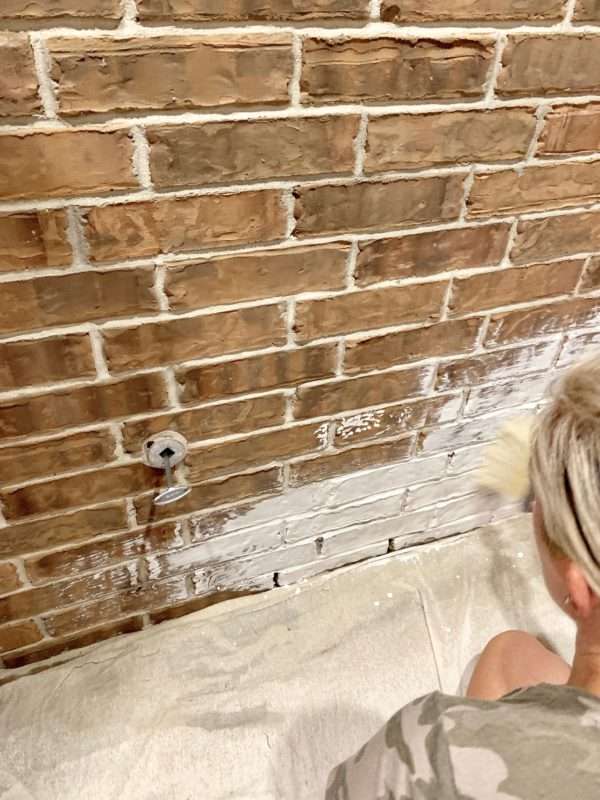
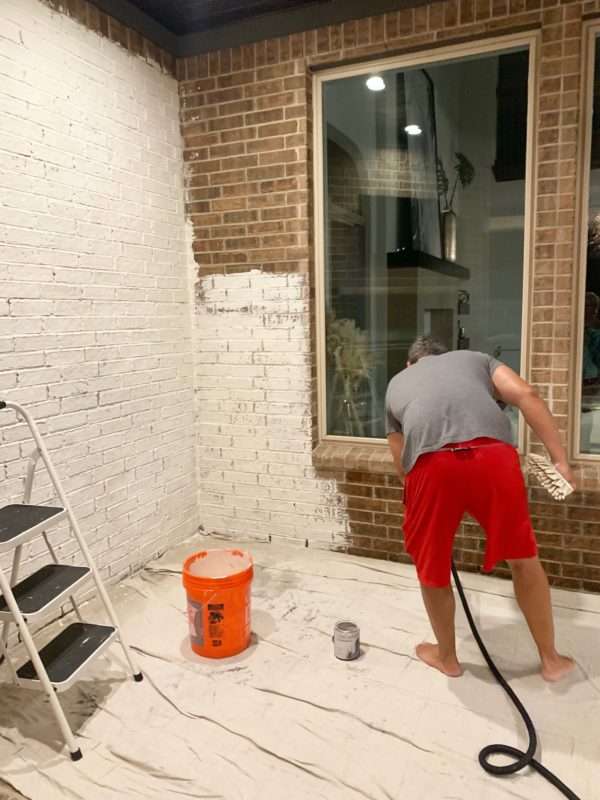
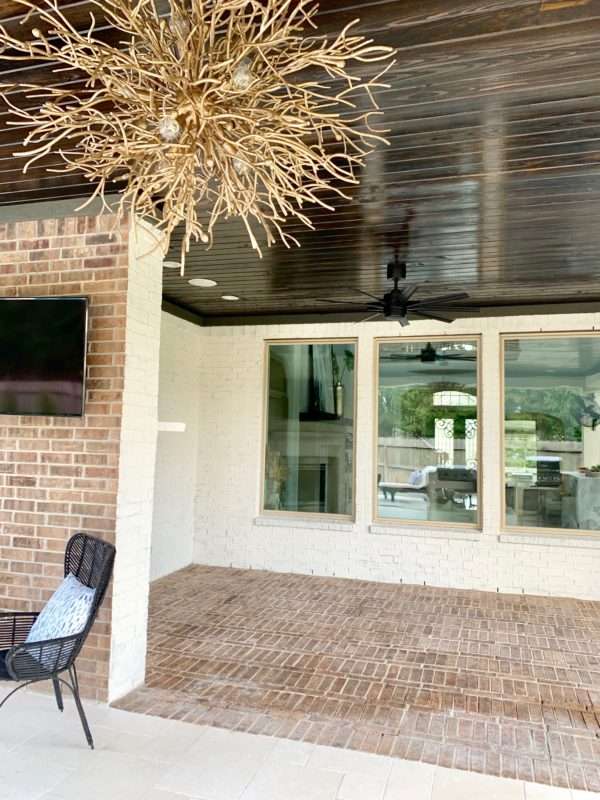
Let it dry! This is when you can expose areas or bricks if that is the style you are going for. Next, clean up your mess. If you were smart and followed step one, this should be minimal. Me, however, I had some scrubbing to do on the brick floor. Let me reiterate, protect your floor! I also didn’t protect the stucco trim, door, windows, or anything else for that matter. Clean up on every one of these items was super easy. A wet rag and a little elbow grease wiped them clean with no scrubbing necessary. All you have left is ENJOY your modernized brick exterior (or interior if you’re working there)!

Melissa Roberts Interiors, home decor blog, diy blog, diy project, diy limewash, diy limewash project, limewash, how to limewash, how to limewash your brick home, easy steps to limewash your home. how to limewash walls. how to limewash your fireplace, patio remodel, brick walls, brick patio, brick floor, limewash

Melissa Roberts Interiors, home decor blog, diy blog, diy project, diy limewash, diy limewash project, limewash, how to limewash, how to limewash your brick home, easy steps to limewash your home. how to limewash walls. how to limewash your fireplace, patio remodel, brick walls, brick patio, brick floor, limewash

Notes on Coverage

It’s a beautiful thing when you know how to limewash your brick home. With this product, you can customize your brick to achieve the look you want. If you want full coverage, apply the limewash thick and evenly. For less coverage, water down the product and don’t apply it as thick. The product will appear a bit clearer when applied. Once it dries, it gets darker and provides better coverage. With this product, you have three days to wipe off the product to expose bricks. Simply use a wet rag to do so. Now, I wouldn’t say you can completely remove the product. If you can, that would take some serious elbow power. You don’t have to worry about the unfinished product being exposed to rain or water either; it will not remove the product. While the product is still wet, water will not remove the painted areas.

Melissa Roberts Interiors, home decor blog, diy blog, diy project, diy limewash, diy limewash project, limewash, how to limewash, how to limewash your brick home, easy steps to limewash your home. how to limewash walls. how to limewash your fireplace, patio remodel, brick walls, brick patio, brick floor, limewash

Melissa Roberts Interiors, home decor blog, diy blog, diy project, diy limewash, diy limewash project, limewash, how to limewash, how to limewash your brick home, easy steps to limewash your home. how to limewash walls. how to limewash your fireplace, patio remodel, brick walls, brick patio, brick floor, limewash

What other DIY projects can you do in just a few steps with the minimal cleanup? I am not one to tackle projects without a professional; that should tell you everything you need to know. It is easy, and you can do it! Be sure to Pin this blog post so you can refer to it when you are ready to start! Now that you know how to limewash your brick home get to work! Send me pics when you’re done to MelissaRobertsInteriors. Also, stay tuned to the blog, patio, and pool reveal are coming soon!