Happy October, Friends! It’s officially the season of tricks and treats.
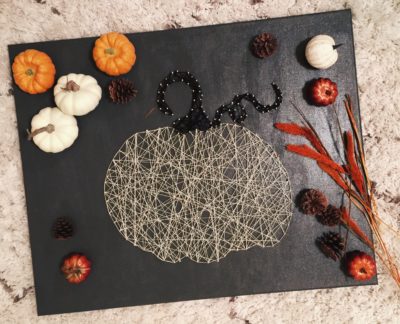
I get to share a little DIY project with you all to try this October that is super easy and allows you to channel that inner Martha Stewart. This fun, little project makes for a beautiful art piece that can be used for Halloween decor OR anytime really (just depends on your style of course) and is extremely simple to make. 😉
1. Gather Your Supplies
You’ll need the following supplies (which you can find at your local hobby/crafting store):
Canvas (whichever size you prefer) or plywood/wood
Paint (if desired)
Foam Board (if canvas is used)
Photo/Outline
Nails
Crochet Thread
**Look around your house before buying items. You’ll be surprised at what you can find laying around (paint, old canvas/wood pieces/frames/paint brushes/nails, etc)
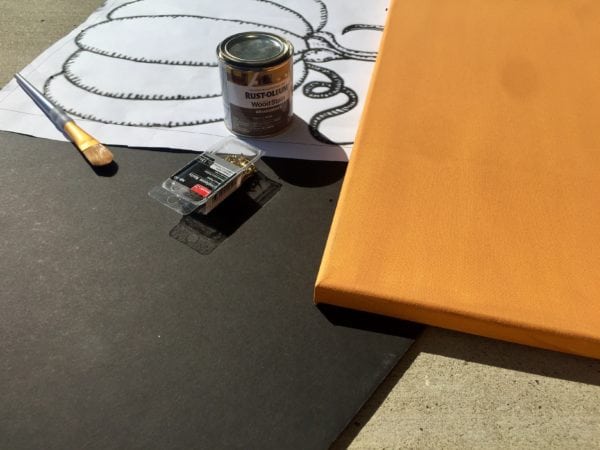
2. Paint Your Canvas or Wood
I wanted my string arts to be rather large to show off as a main decoration piece, so I used a poster size canvas (18×24) for both projects. The Skull Art canvas was already black so no paint was needed, but I had to paint the Pumpkin Art canvas which was painted orange; I used a wood stain that was laying around the house from a prior project. Remember to always look before buying to see if you have any leftover paint and/or items…in my case, I got lucky to find both the paint and canvas! Make sure that you paint opposite of what your thread/yarn color is.
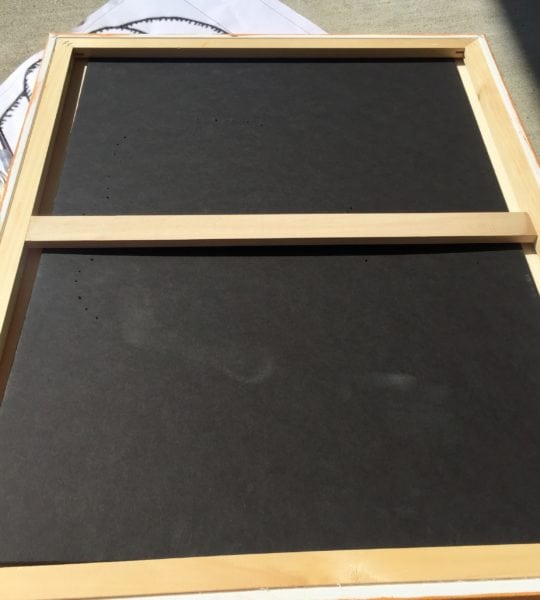
If using a canvas, I suggest getting a foam board and slipping it into the back between the boards (like the picture above). This will hold your nails in place and not let them stretch out or go through the canvas. You won’t need to glue it or anything since the boards are pretty tight once slipping it through.
3. Print Your Outline
Find your image and print it out to put on the canvas or wood as your guided outline. I found both the pumpkin and skull image through google. I printed mine through a large printer or you may scale the image to print on multiple pages if large printing is not an option for you.
To print on multiple pages: Open the image and change settings to 2 by 2 pages or 4 by 4, etc (depending on how large you need it). Be sure to make sure all pages are selected when printing.
4. Nail Your Outline.
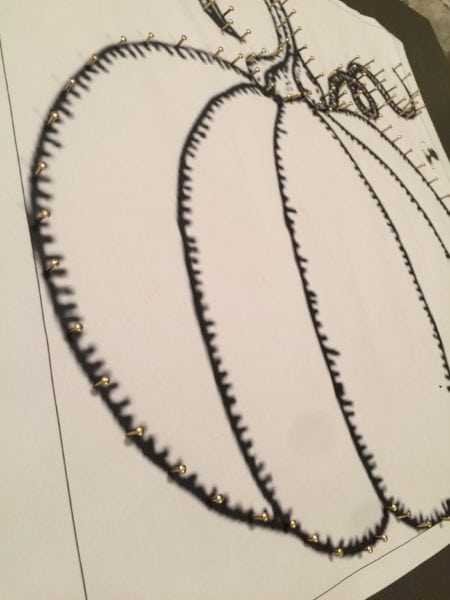
Take your nails and outline the edges on top of the paper. You’ll need a hammer to push the nails in. Don’t push all the way through. You’ll only want about 1/4 pushed into the platform. I used a remote to help push the nails through my canvas, but a hammer will definitely make things go a lot faster.

After you have marked your outline out with nails, tear the paper off leaving the nails exposed.
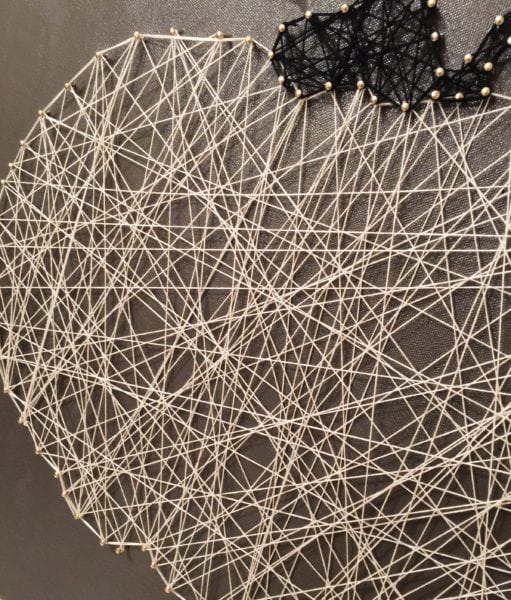
5 . String Along.

Tie a knot within your string and make an outline. I started at the bottom and traced out the nails weaving them if needed to make curves. Double the outline with the string to make it more bold. Begin connecting the string between the nails by using a zig zag pattern starting from one nail at the bottom to one diagonally or across at the top until you have made the design you want. Get creative!
6. Tie it Off
Trim the string ends after tying the string off. Then hang that sucker up and admire from afar! Also, pat yourself on the back. Great job, Martha Jr.
We would love to see your project! Share your string art’s with us at MRI using #MRITutorialTuesday hashtag on instagram and facebook!